April 17, 2026
Installing Wall Panels: 9-Step Guide
Covering a 6 m² wall with SPC panels takes, if you know all the tricks, under two hours. When it takes longer, one of five typical mistakes has usually crept in. This guide shows step by step how installation really works — and which mistakes to avoid.
Before installation: tools and preparation
The Drop-Click installation of our NordPaneele is deliberately tool-sparse. You need:
- Utility knife or jigsaw — for cutting panels to length
- Spirit level (60 cm minimum) — for the first row; after that panels orient each other
- Tape measure and pencil — for marking
- Rubber mallet — for occasional tapping, optional
- Mounting tape or construction adhesive — for attachment to the wall
No template needed, no levelling devices, no jigsaw extension. An ordinary household has most of this in the cellar already.
How many panels do you need?
Calculating the right quantity is easier than most think:
- Wall width × wall height = gross area in m²
- Subtract doors, windows, large cutouts (only if larger than 1 m²)
- Plus 10% waste margin for straight cuts, 15% for layouts with many corners or angles
Example: A wall 4 m × 2.5 m = 10 m². Subtract a door (2 m × 0.9 m = 1.8 m²) = 8.2 m². Plus 10% waste = 9.0 m² order volume. With panels 240 × 60 cm (1.44 m² each) that's 7 panels. Our panel calculator computes this automatically including matching skirting and corner profile quantities.
Adhesive, click, or screwed installation?
With NordPaneele you have three installation options:
- Click system (floating) — panels laid over a thin substructure (1–3 mm EPS underlay or gypsum board) and click together. Advantage: fully reversible, portable when you move, ideal for rentals. Downside: minimally more room depth (~6 mm) and not ceiling-suitable.
- Full-surface bonding — with mounting adhesive (hybrid polymer, e.g. Soudal Fix-All, PU adhesive also possible) directly on the wall. Advantage: maximum secure, no play, ideal for ceilings and bathrooms. Downside: irreversible; panels break during removal.
- Mechanical fixing (screws or clips) — for large walls in commercial spaces, hotels, retail. The safe method when you want panels later-replaceable without click-system complexity. Downside: visible fixing points (covered by trim strips).
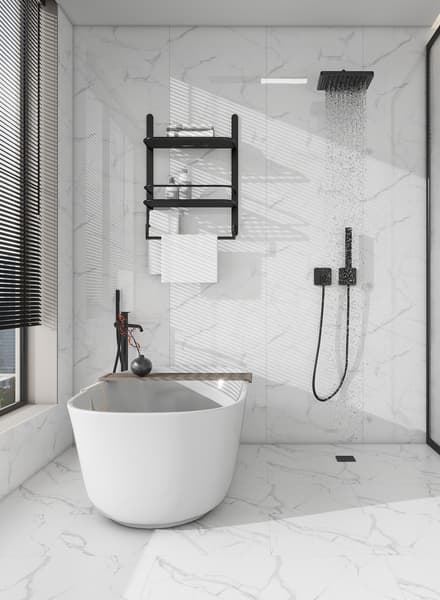
For a typical bathroom or living room we recommend full-surface bonding. For rentals or planned later modifications: click system.
The substrate: what needs to happen first?
SPC panels tolerate unevenness up to 3 mm. Anything beyond must be levelled. Practical notes:
- Old tiles: must be firmly seated, but panels can be mounted directly over them. No demolition required.
- Wallpaper: remove woodchip and textured wallpaper. Smooth wallpaper can stay if firmly adhered.
- Plaster: fill cracks with filler, repair flaking areas. Surface must be dry and dust-free.
- Wet walls: measure residual moisture — above 2% dry before installation.
Step 1: Acclimatise the panels
Before installation: store panels for at least 24 hours in the room where they will be installed. SPC expands minimally with temperature — if a cold panel is installed immediately in a warm room, it can develop minor stress-related movement after a few weeks.
Step 2: Mark the starting line
The first row determines the rest. With the spirit level mark a horizontal line on the wall — that becomes the top edge of your first panel. Why not start at the floor? Because floors are rarely perfectly level.
Start 3–5 mm above the floor — that provides room for thermal expansion. You hide the gap later with skirting.
Step 3: Install the first row
First panel from left to right with the tongue side facing the wall. Press lightly against substrate. Check level. Only then add the next panel.
The most common mistake here: not verifying the first row is truly exactly level. Even 1 mm deviation over 2 m compounds to 1.5 mm offset by 3 m height — visible to anyone critical.
Step 4: Second row and offset
Stagger the second row by one-third to half the panel length — similar to parquet flooring. Looks visually calmer and distributes potential weak points.
Step 5: Corners and cutouts
Outlets and switches: mark the hole, cut with jigsaw or sharp knife. SPC cuts cleanly — work slowly, not jerkily, otherwise splintering.
Outer corners: miter two panels at 45° or cover with corner profile. Profiles are the safe option for beginners.
Inner corners: panels from one wall butt against panels of the next — joint sealed with silicone (in bathrooms) or left open.
Step 6: Trim strips and silicone
Top: ceiling trim. Bottom: skirting. In bathrooms additionally: silicone in all joint edges to tub, shower tray, sink. Sanitary silicone, not window silicone (the latter moulds).
The five most common mistakes — and how to avoid them
- No acclimatisation: panels installed straight out of the packaging. Result: micro gaps after a few weeks. Fix: wait 24 hours.
- Crooked starting line: floor used as reference. Result: wall grows crooked. Fix: spirit-level line marked.
- No expansion gap at the floor: panels butted to the floor. Result: bulging under temperature change. Fix: 3–5 mm gap.
- Wrong adhesive: standard silicone used as mounting adhesive. Result: panels slip. Fix: use real mounting adhesive or VHB tape.
- Installation on wet substrate: damp wall covered. Result: mould behind the panel. Fix: residual moisture measurement before installation.
When is a tradesperson worth it?
Honest take: if you've ever assembled Swedish-flatpack furniture, you can install a panel wall. The system is deliberately consumer-friendly.
As a reference: a tradesperson charges €25–45 per m² labour for panel installation. For 20 m² we're talking €500–900 labour costs.
Unsure? You can always order free samples and physically test the click connection. Our detailed installation page contains additional videos.
After installation: care and maintenance
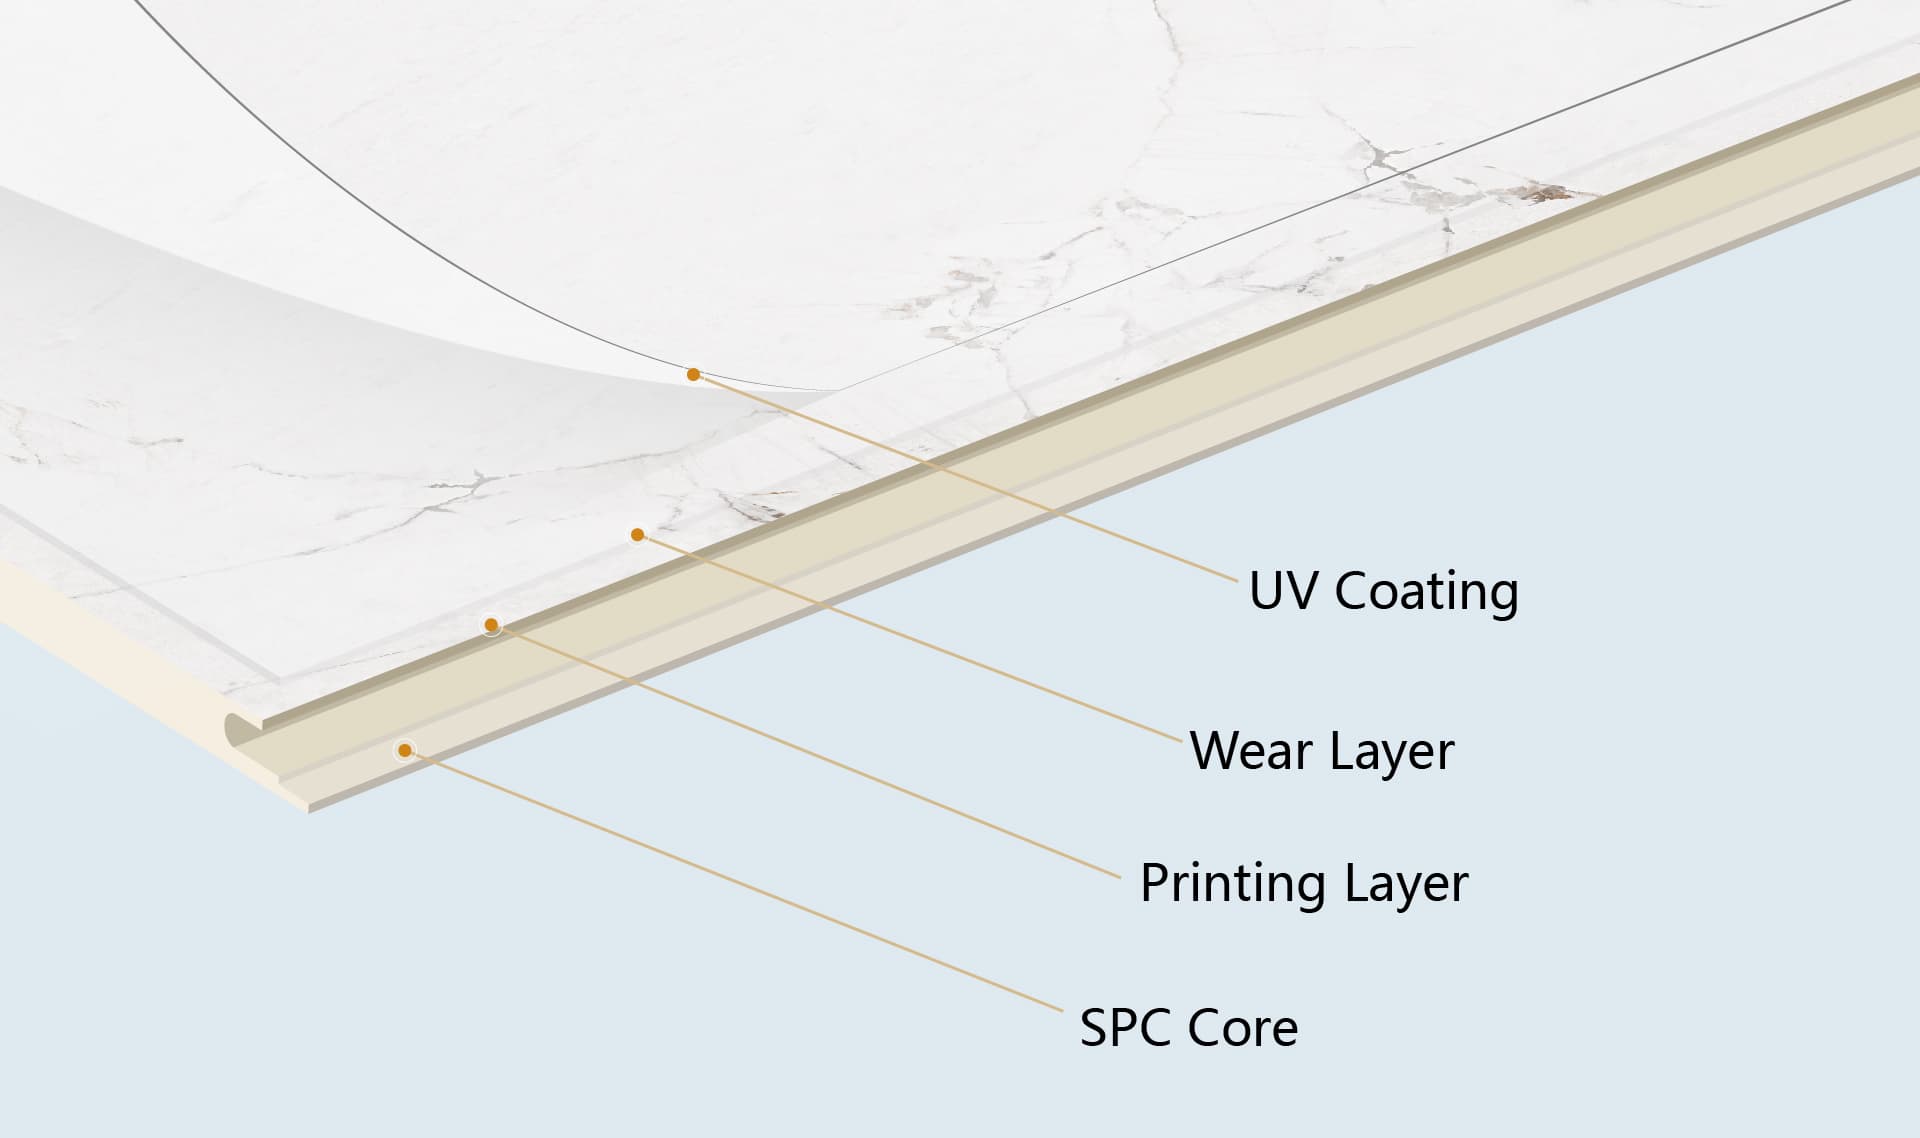
SPC panels are extremely low-maintenance — the PU protective layer tolerates all common household cleaners. For daily wiping a damp microfibre cloth suffices. For stubborn dirt (kitchen grease, bathroom limescale) use a pH-neutral all-purpose cleaner.
Avoid: abrasive cleaners, steel wool, acetone-based solvents, steam cleaners with direct jets on joint edges. These can damage the protective layer or force moisture into the click connection.
For small scratches or damage: we supply a reserve panel with every product. Damaged individual panels can be swapped tool-free in click installation. Full-surface bonded installations are trickier to repair — always order 10% reserve.
Troubleshooting: what to do if...
... panels crackle or creak after some time?
Cause is almost always missed acclimatisation or insufficient expansion room. For minor crackling: wait to see if the system stabilises over 2–3 weeks. For heavy crackling: remove individual panels (possible only with click system), increase expansion joint, re-install.
... a click connection no longer closes?
Likely the tongue or groove profile is damaged — usually from too-hard rubber-mallet blows during installation. Replace panel. Reserves are supplied with every order.
... moisture appears behind a panel?
Act immediately. Remove panels in the area (carefully pry loose with a spatula for bonded installations), dry the wall, fix the cause (leaky pipe? condensation from outside?), only then re-install. SPC itself is waterproof, but a permanently wet wall is always a problem — regardless of the panel.
... a corner doesn't close cleanly?
Usually a retrofit corner profile helps (aluminium or SPC-coloured, available at any hardware store). Alternative: clean silicone bead (sanitary silicone for wet areas, acrylic for dry).
Special cases: when the wall is more complicated
Sloped walls and attic ceilings
Sloped walls look particularly striking with wall panels — but require more planning. Panels are laid parallel to the slope (not perpendicular to the floor), and the joints to the ceiling and knee wall need expansion profiles. Work with a long rail or straightedge, not just a short spirit level.
Ceiling installation
SPC panels can also be installed on ceilings, but only via full-surface bonding — the click system doesn't hold there. Use a stronger PU mounting adhesive and additionally mounting strips for the first hour while the adhesive cures. A second person to hold-up is practically mandatory.
Half-height cladding
Very popular in bathrooms and dining rooms: panels only to half height (90–130 cm), with paint or wallpaper above. The top edge uses a profile strip or silicone joint. Tip: align the top edge to a visual reference line — countertop, windowsill, mirror base. Much calmer than an arbitrary height.
Conclusion: installation isn't witchcraft
Key insight: SPC wall panels are deliberately designed for DIYers. No specialty tools, no pro-grade moves, no years of training required. If you've assembled a kitchen yourself, you can handle wall panels.
The five error-avoidance rules one more time in one sentence: acclimatise, start level, leave expansion room, use the right adhesive, ensure dry substrate.
Questions? Reach out via our contact form. Technical questions answered within 24 hours.
What proves itself after installation
A small collection of real observations from last year's customer conversations that confirm themselves in nearly every installation — and that you won't find in any factory manual:
- The first row is 80% of the work. 20 minutes invested in the first row saves 2 hours on the rest. Rushing the start is the most expensive shortcut of the whole installation.
- Two-person installation is more efficient. Not because two panels are placed simultaneously, but because one measures while the other installs. Solo installation is possible, just slower.
- Keep reserve panels. At least two panels left over — after 3 years when you install a new piece of furniture or an outlet, they save you a whole new order.
Related articles: SPC vs PVC vs real wood · Wall panels in the bathroom · Fire classes B1 explained